
In this Adobe Photoshop graphic design tutorial, we are going to create a magical glow effect coming from a box in Photoshop. This is a pretty simple effect that looks great and can easily be adapted for use in other ways.
Download and set up the stock photo
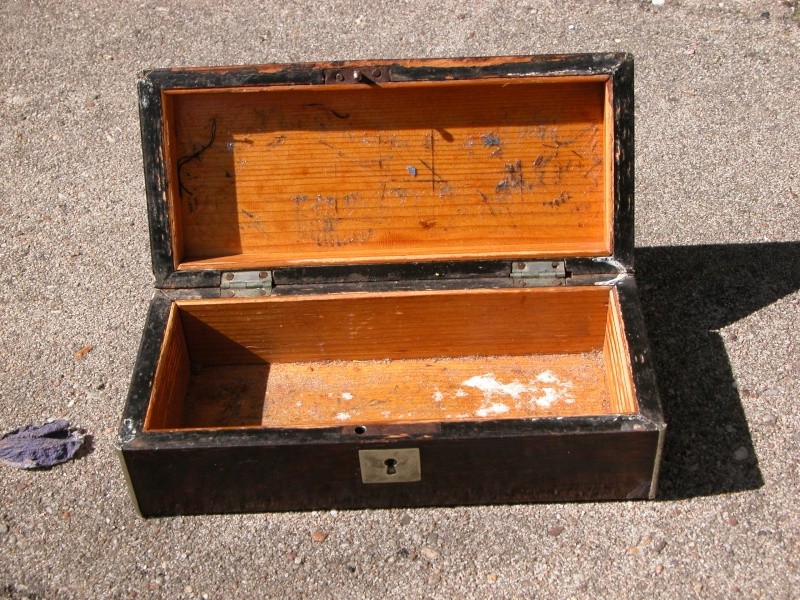
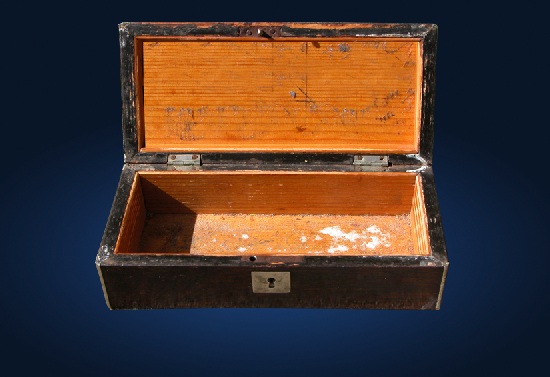
1 Lets go ahead and get our stock photo. You can download it here. Open it up in Photoshop.
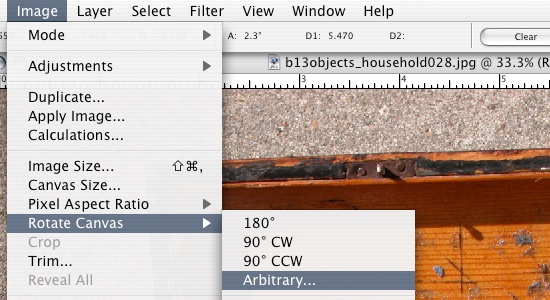
No we want to straighten out the box so click and hold down the Eyedropper Tool in the Tools panel, and then click on the Measure Tool (also known as the Ruler Tool).

2 Now click and drag a line so it follows the bottom edge of the box. Go to Image > Rotate Canvas > Arbitrary. Don’t change the number, click OK. This will straighten out your box.
Now go in and crop the document so there are no white edges showing.
Cleaning up the stock image
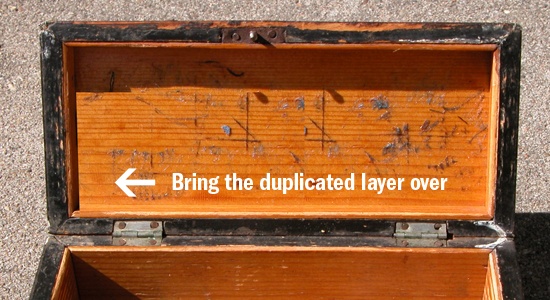
3 Since the light source is going to be from the inside, our shadow is going to be different that how it currently is. So, we are going to get rid of the shadow on the cover.
Use the Marquee Tool and select a part of the bright area, then bring that selection into a new layer (Ctrl + J). Bring it over to the left edge and fit it in the corner. (If you use Ctrl + T to transform the layer, then control and move the corners of the box it will skew them to get a better fit.)
4 Add a layer mask by clicking on the Add a layer mask button at the bottom of the Layers panel, and use a soft black brush to mask out the right side of the highlighted area we just duplicated (the middle area of the box).
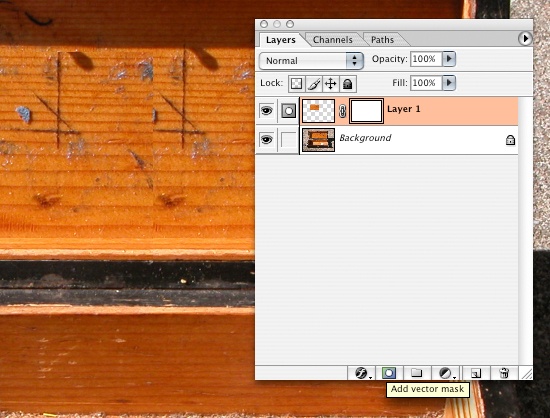
Play around with it until you get a smooth transition between the two layers and so there aren’t any duplicated areas.
5 Now link the two layers.
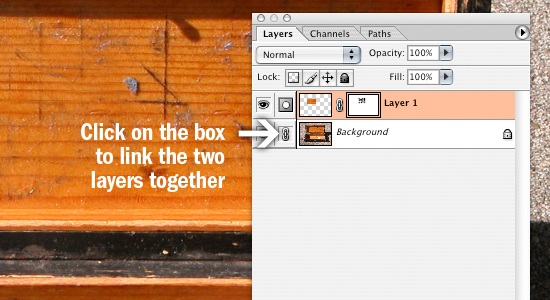
Merge them together, Layer > Merge Layers (Ctrl + E).
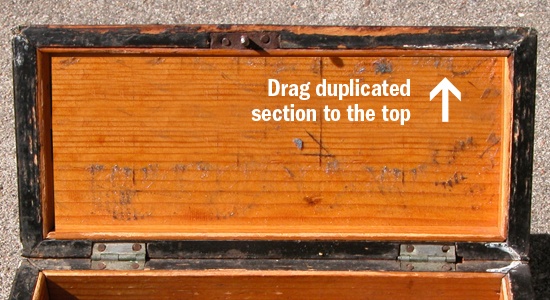
6 Now we are going to take another selection, this time grab a selection of the entire width of the brighter area we just made. Bring the new selection into a new layer (Ctrl + J). Then blend the new layer like in step 4.
Use the Clone Stamp Tool (S) by first Alt + clicking on an area you want to clone from, then painting the area that needs to be cloned.
Cutting out the box from our stock image
7 Now we are ready to cut out the box.
Go in and use the Pen Tool to cut out the box and bring it into a new document. Use 1680 x 1050 px for its dimensions. Size it down to around 30%.

Creating the background
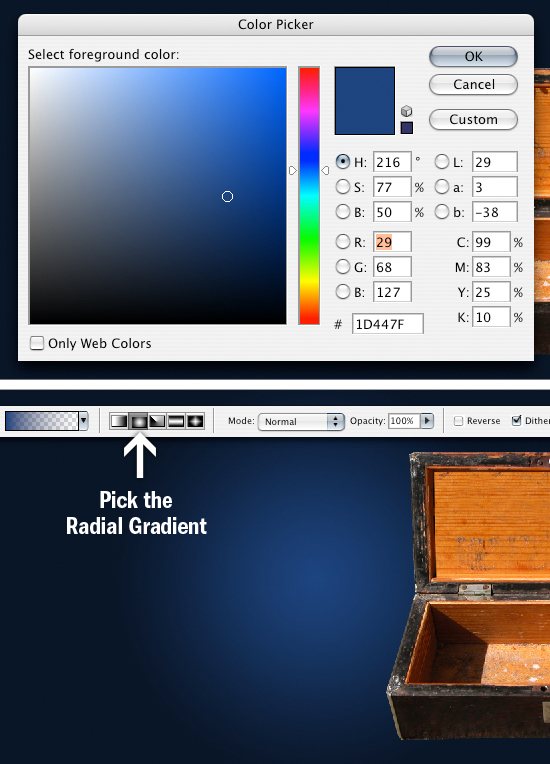
8 Let’s work on the background. Pick a dark blue color and fill the background (Ctrl + Del).

9 Grab a lighter version of that color, create a new layer (Ctrl + Shift + N) and create a radial gradient.
10 Transform the gradient (Ctrl + T), bring it under the box then stretch and squeeze it so it fits like so.
Darken the box
11 We are now going to darken the box. Open up the hue/saturation window, Image > Adjustments > Hue/Saturation (Ctrl + U). Change your setting like I have them below.
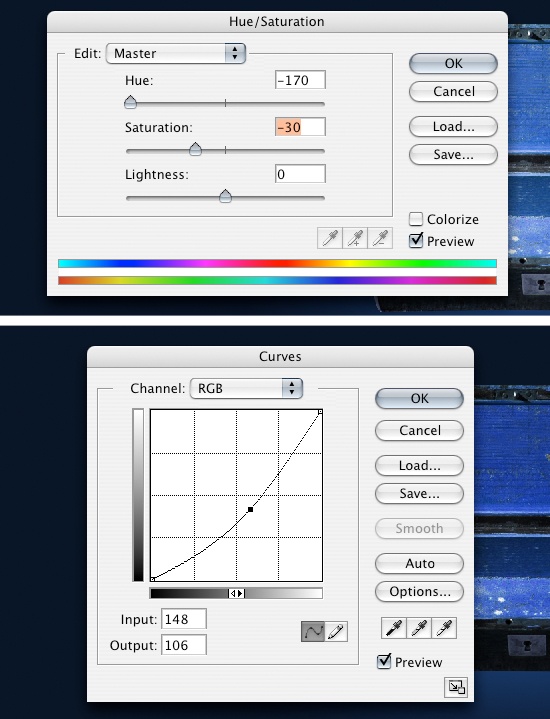
Open up the Curves window, Image > Adjustments > Curves (Ctrl + M) and change your settings to something like what I have.
Putting in the glow
12 Let’s put the glow in the box now. Using the Elliptical Marquee Tools draw a circle so the side edges of the box touch the inside sides of the box.
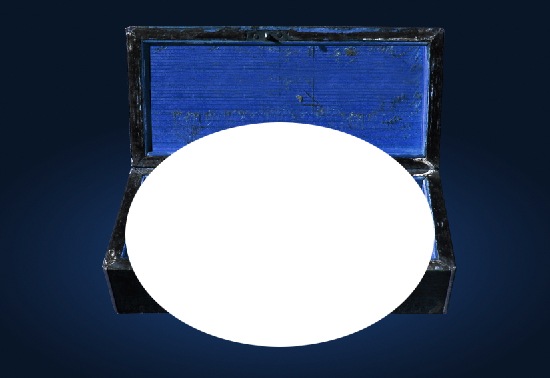
13 Select the circle layer by using (Ctrl + Right-click) circle layer and create a new layer (Ctrl + Shift + N). Fill the area with a light blue. Make sure the white circle is the top layer. Click on the white circle layer and transform the circle using Edit > Free Transform (Ctrl + T). Hold down Shift + Alt shrink the circle.
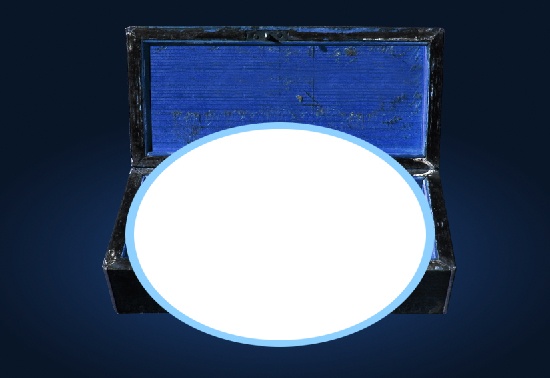
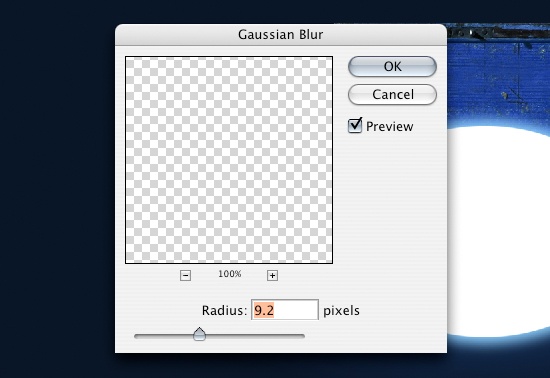
14 Now to give it a glowing look we are going to blur the edges of both the circles. First click on the blue circle layer and then go to Filter > Blur > Gaussian blur. Do the same thing with the white circle.
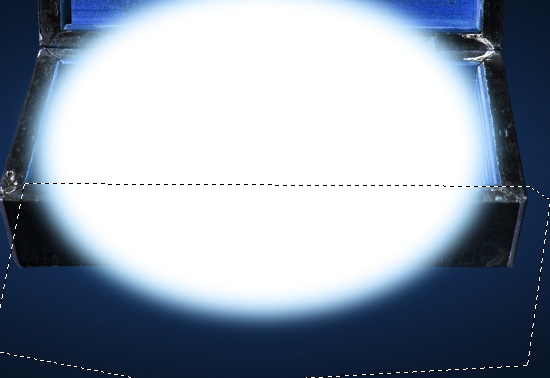
15 Link the two circles together (click the empty box to the left of the layer, then merge the layers, Layer > Merge Down (Ctrl + E) to merge the two layers.
Now use the Polygonal Lasso Tool to make a box around the bottom part of the circle that isn’t inside the box and delete it.
Creating the outer glow
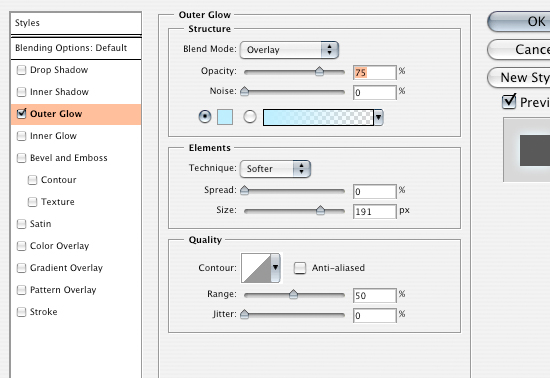
16 Now we are going to add an outer glow to the circle. Click on the "Add a layer Style" button at the bottom of the Photoshop Layers Panel and select Outer Glow. Adjust the settings like I have them. The color is going to be R: 190 G: 239 B: 255.
17 We are now going to make another radial gradient using white as our color. Put the layer behind the glowing circle and stretch it out so it covers the whole width of the box.
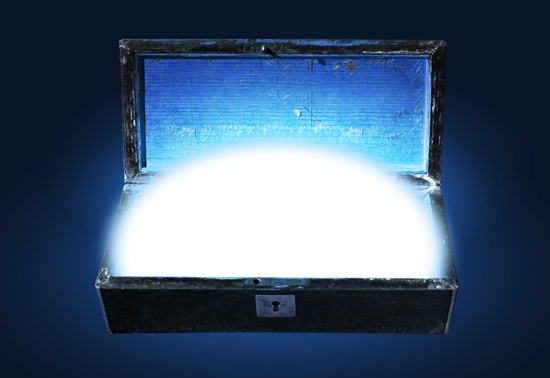
Change the Blending Mode to Overlay. Now duplicate that layer by right-clicking on the layer and selecting Duplicate Layer… in the dialog box (Ctrl + J) to make it brighter.
Adding in the details (floating particles)
18 Create a new layer (Ctrl + Shift + N).
We are going to create some particles floating off the glow. Click on the Brush Tool (B) and get a brush with 0% hardness, around 20 px. Pull up the brush settings (F5).
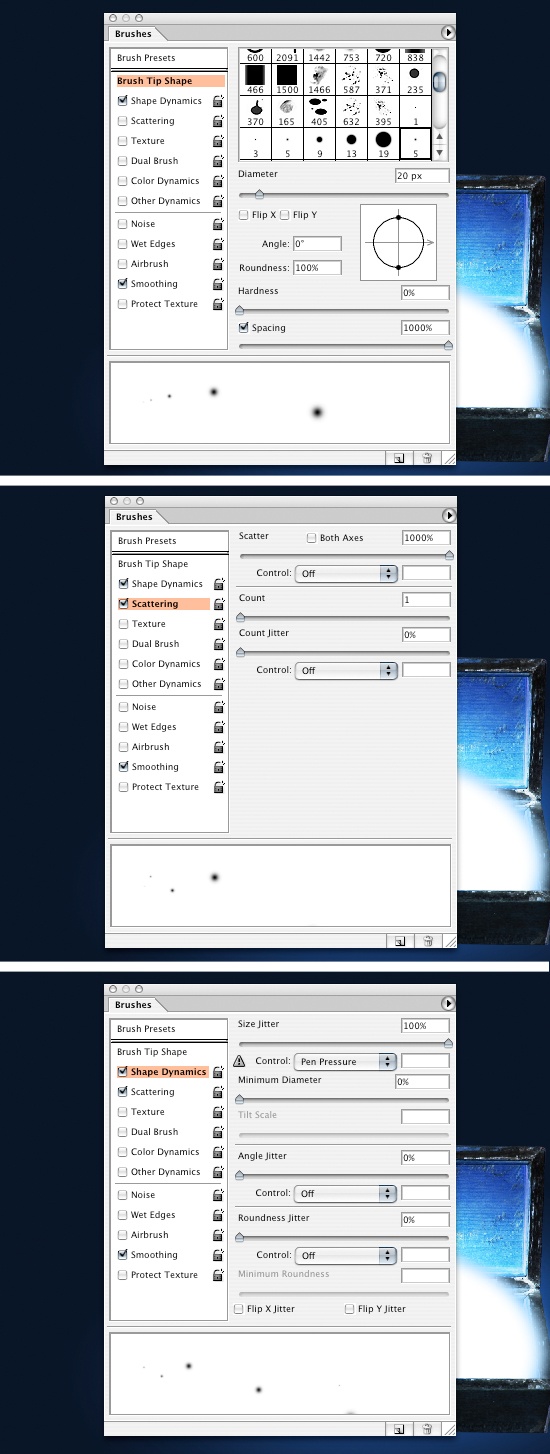
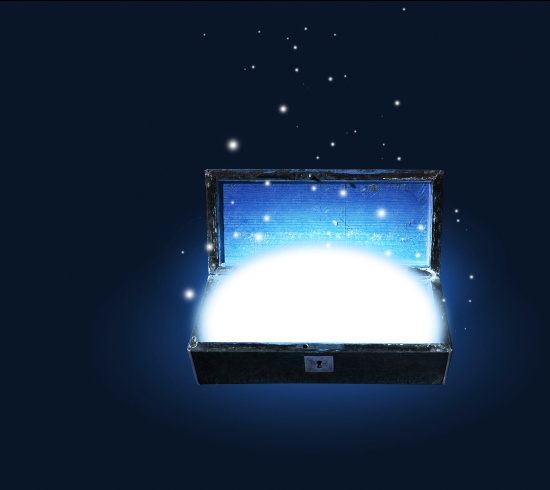
19 Create a new layer and start painting on a few particles until you get something you like the following. You can adjust the size of the brush and experiment with its settings to get the desired effect.
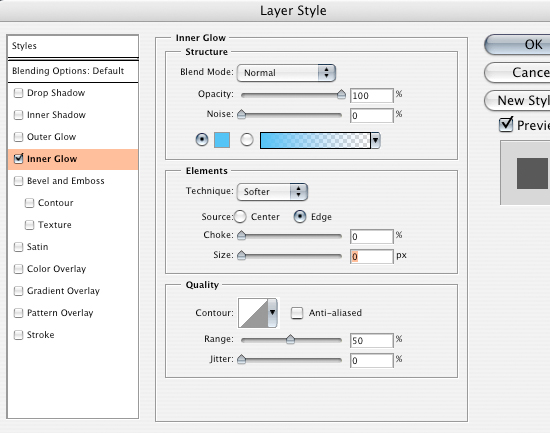
20 Now go into your layer styles and change your outer and inner glows to what I have below. Drag that layer just below the circle layer.
Giving the box a drop shadow
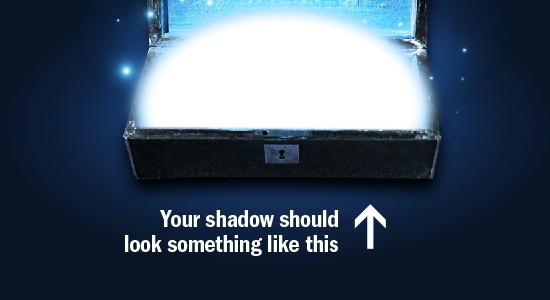
21 We are going to give the box a little bit of a shadow. Click on the box layer and duplicate the layer (Ctrl + J). Use Ctrl + Right-click on the new layer to select it, and fill it with black #000000.
Drag it below the box layer.
Go to Filter > Blur> Gaussian Blur and change the setting to 12.4. Click OK. Now bump the shadow down a little bit.
22 Click on the Elliptical Marquee Tool, change the feather to 100 px and draw a circle around the box.
Make sure that your foreground is black (#000000) and the background is white (#FFFFFF), then go into Filter > Render > Clouds. Change the Blending Mode of the layer to Soft Light and the opacity to 70%.

0 Comments:
Post a Comment